Custom Challenge Coins: The Complete Buyer’s Guide
Custom challenge coins are specified by five decisions — diameter, thickness, finish, edge and relief depth — plus how the artwork will be supplied. A 2-inch, two-sided coin in soft enamel is the common default for police, fire and military units, with production usually running 18–25 days after proof approval. This guide covers each choice in order, so a design can go from a patch photograph to a finished coin without guesswork.
Those decisions interact. A portrait needs sculpted depth; a motto-heavy design needs a flat face and crisp type; a coin meant for a pocket behaves differently from one meant for a display case. Start with the custom challenge coins overview if you only need the shape of the process, then use this guide for the reasoning. Departments and units can see the full sequence on the police and fire challenge coins page.
What a Challenge Coin Specification Contains
A coin is small, but the number of choices behind it is not. A complete brief states the diameter, thickness, number of sides, finish, plating, edge treatment, relief depth, quantity and presentation format. Missing any one of them leaves a decision to be made by someone who does not know your unit — and the result is usually a coin that is technically fine but not quite right.
Write the specification as a list before you look at artwork. If the coin is for a department, decide whether it represents the whole agency or a single unit, because that determines how much text has to fit. If it marks a retirement or an anniversary, decide whether it will be carried or displayed. Those two answers settle most of the five decisions above. The guide to designing police and fire coins works through the same decisions from the artwork side.
Sizes and Thickness: 1.5″, 1.75″, 2″ and Beyond
Diameter sets how much of the design can be read at a glance. Thickness sets how the coin feels in the hand. Both matter, and neither should be chosen purely on whether a larger coin looks more impressive — a coin that is too big for a uniform pocket ends up in a drawer.
| Size | Typical thickness | Typical use | Notes |
|---|---|---|---|
| 1.5″ (38 mm) | 2.5–3 mm | Lightweight carry coins, corporate giveaways, small unit tokens | Smallest practical size for legible text; keep the layout simple |
| 1.75″ (44 mm) | 3 mm | Unit coins, department coins with moderate text | A good balance between detail and carry weight |
| 2″ (50 mm) | 3–4 mm | The standard for police, fire and military unit coins | Most room for a crest, motto and dates without crowding |
| 2.25″ and above | 4 mm or heavier | Command coins, presentation and anniversary pieces | Display-oriented; less comfortable as an everyday carry coin |
Two inches is the default for a reason: it holds a badge or crest, a unit name, a motto and a date without forcing any of them into tiny type. Smaller coins work well when the design is an emblem with very little text. Larger coins make sense when the coin is a presentation object rather than something a member carries daily.
Thickness is easy to overlook and immediately noticeable in the hand. A standard coin runs about 3 mm; a 4 mm casting feels more substantial and changes the balance of the design. Weight is not cosmetic for this product — it is part of what makes a coin feel legitimate when it is exchanged. Ask for a sample if the hand-feel matters, and state both diameter and thickness when you request a quote so the specification is unambiguous.
Process: Soft Enamel, Hard Enamel and Die Struck
The process determines how the artwork becomes a surface. Three options cover nearly every custom coin, and the right one usually follows from how much colour the design uses and where the coin will be kept.
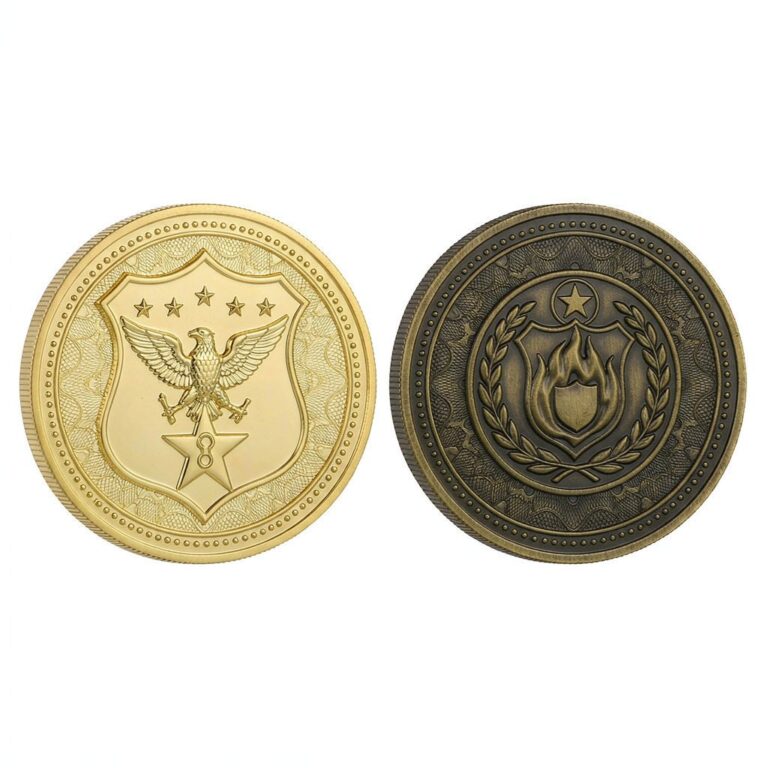
Soft enamel is the classic look: raised metal borders with recessed colour. It holds artwork detail well and suits designs with several distinct colours. Hard enamel, also called cloisonné, is polished flat to a smooth, jewellery-like finish; it is the usual choice for commemorative and retirement coins. Die struck coins use no enamel at all — the design is all metal, with an antique-plated finish providing the contrast. That is the traditional military style.
Detail behaves differently in each process. Fine lines separate cleanly in soft enamel because the metal border physically divides the colours; in a die-struck coin, the same lines have to be cut deeply enough to catch light. If your design depends on small text, ask for a proof at the actual diameter rather than trusting the screen version. Our challenge coin plating options guide explains how the finish and the metal tone work together.
Plating: Matching the Department’s Metals
Plating is the metal surface behind and around the enamel. It sets the overall tone of the coin and, more practically, determines how well the coin survives being carried in a pocket. Departments often choose a plating that echoes their badge metal or uniform insignia.
| Plating | Appearance | Best for | Notes |
|---|---|---|---|
| Bright gold | Lustrous yellow, mirror-like | Traditional unit coins, formal presentation | Striking in photos; shows handling marks readily |
| Antique gold | Warm, muted, darkened recesses | The common choice for police and fire coins | Hides handling marks and adds depth to relief |
| Antique silver | Cool grey with darkened detail | Fire, EMS and units whose insignia is silver-toned | High contrast with dark enamel colours |
| Antique copper | Reddish brown, subdued | Anniversary and commemorative coins | Pairs well with warm enamel palettes |
| Black nickel | Dark gunmetal with a slight sheen | Modern and tactical-themed designs | Makes bright enamel colours stand out sharply |
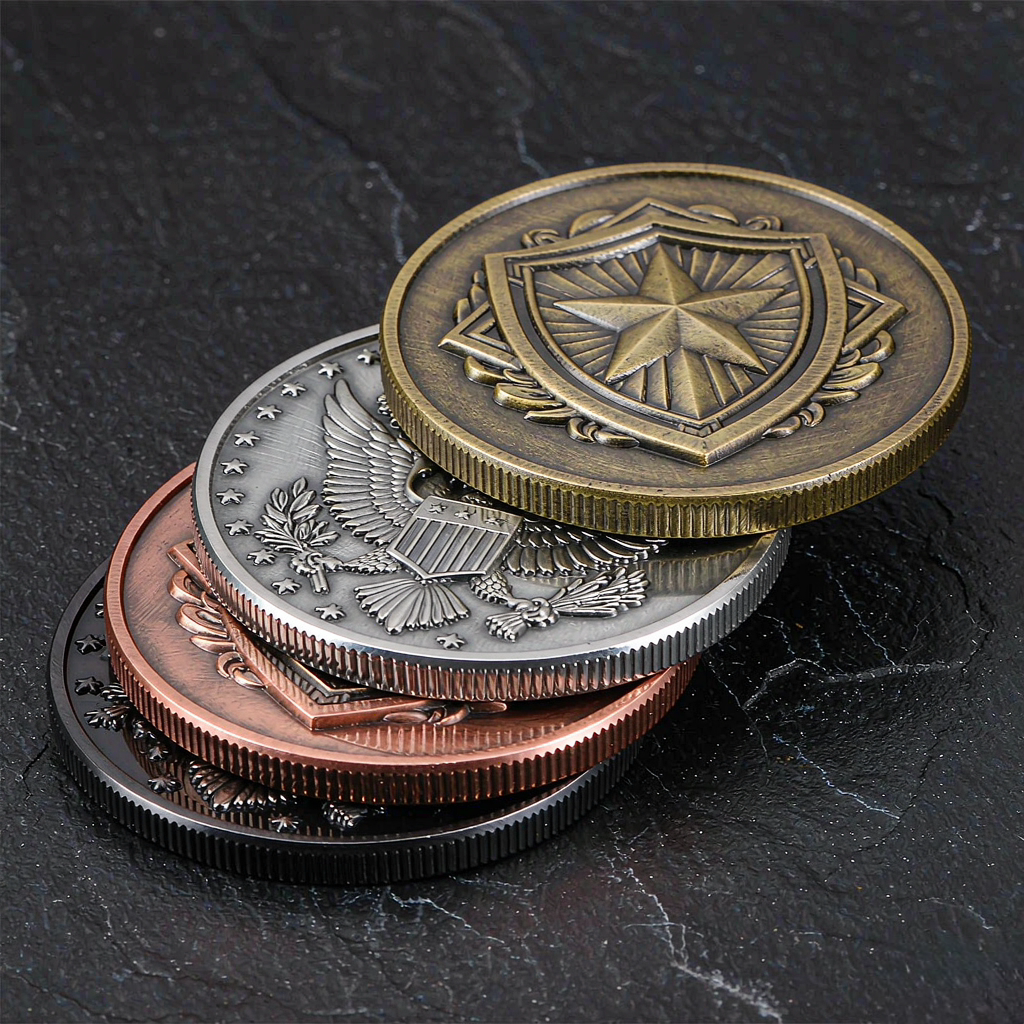
Antique finishes are the practical default for a coin that will be carried: the darker recesses disguise the small scuffs that accumulate in a pocket, and the relief reads more clearly in photographs. Bright finishes look excellent on a podium or in a display case but need more care. The full range, with notes on how each plating interacts with enamel colours, is in our plating options guide.
Choose plating after the enamel colours are settled, not before. A deep blue reads differently against antique silver than against bright gold, and a black-nickel base will change how pale colours appear. If you have Pantone codes for your department colours, include them in the brief — the proof stage is where colour placement is checked against the chosen metal.
Edge Options
The edge is a small detail that is felt every time the coin is picked up. It is rarely the first thing specified and almost always noticed once the coin is in circulation.
| Edge | Description | Best for |
|---|---|---|
| Standard (smooth) | Flat, plain perimeter | Simple, text-led designs where the face carries all the detail |
| Reeded | Fine parallel ridges, like a traditional coin | Classic military styling and formal unit coins |
| Rope | Twisted rope pattern around the rim | The classic department and unit-coin choice |
| Cross-cut | Diamond or cross-hatched pattern | Distinctive ceremonial coins and command pieces |
| Scalloped or shaped | Perimeter follows the emblem rather than a circle | Shield-shaped crests and custom silhouettes |
Rope and reeded edges are the two most requested for department coins. Both add a tactile signal that this is a formal object rather than a token. A shaped perimeter is worth considering when the badge itself is a shield — it removes the empty space that a circular coin leaves around a tall crest. Ask your sourcing partner how the chosen edge interacts with the relief depth near the rim; very high relief close to the edge can soften in the casting.
2D vs 3D: When Sculpting Is Worth It
Relief depth is the decision that changes the tooling most. A 2D coin uses a flat die with raised and recessed levels; a 3D coin uses a sculpted die with multiple depth planes. The visual difference is obvious, but so is the difference in what each type does well.
| Aspect | 2D relief | 3D sculpted |
|---|---|---|
| Depth | One or two flat levels; contrast comes from borders and colour | Multiple sculpted levels with rounded transitions |
| Best for | Text-led designs, seals, badges, simple emblems | Portraits, crests with depth, animals, layered scenes |
| Small type | Crisp and legible at standard diameters | Can soften where type meets a curved surface |
| Artwork input | Clean vector file with separated colours | Reference images plus a relief brief or render |
| Tooling time | Shorter; the die is cut from flat artwork | Longer; the die is sculpted by hand and reviewed |
| Typical choice | Most department and unit coins | Command coins, presentation and commemorative pieces |
A 3D coin earns its place when the design has real depth: a face, an eagle, a crest with layered elements. Those subjects lose something important when flattened. It earns less when the design is a motto, a badge outline and a date — in that case, clean 2D contrast reads sharper and holds small text better.
If you are unsure, ask to see both configurations before deciding. A good sourcing partner will prepare a 2D proof and describe what a sculpted version would change, so the choice is based on the design rather than on an assumption that 3D is always the upgrade. For the full comparison of finishes and surfaces, see the plating and finish guide.
Designing a Coin From a Patch or Badge
Most department coins begin with existing imagery: the patch, the badge, the unit emblem. That is a good starting point because the identity is already settled. The work is translating an image built for fabric or print into one built for metal.
- Start with the highest-resolution source you have. A flatbed scan of the patch is better than a phone photograph; a vector file from your graphics team is better still.
- Simplify before adding. Patch designs often contain gradients and tiny details that will not survive casting. Reduce them to bold shapes and clear borders.
- Place the text around the emblem. Unit name, motto, dates and a commander’s name belong in a ring around the central image. Keep them away from the rim.
- Match the plating to your insignia. Antique gold or antique silver is usually the closest fit to department metals.
- Approve a digital proof before tooling. This is the point to correct spelling, dates and colour placement — after the die is cut, changes are disruptive.
Colour matching is usually done at the proof stage. Supply Pantone references or a clear patch photograph and the enamel colours can be matched to it; the digital proof shows exactly where each colour sits. The artwork guide lists the accepted file formats and line weights. If the design is still only a sketch, say so when you enquire — layout help can be arranged before the proof stage. A worked example is in the police and fire coin design guide.
Presentation and Packaging
How a coin is handed over changes how it is received. Bulk coins for a unit go into simple bags; command and retirement coins are usually presented in something that signals the occasion.
| Option | Best for | Notes |
|---|---|---|
| Individual poly bag | Bulk issue to unit members | Standard, protective and easy to sort |
| Acrylic capsule | Collector and command coins | Keeps the surface clean and supports display |
| Velvet pouch | Retirements and award ceremonies | Gives the handover a deliberate moment |
| Display box | Chief coins, VIP gifts, anniversaries | The formal presentation choice |
Treat presentation items as a separate line in the brief. A unit order might be all bagged coins plus a small number of boxed command pieces; mixing the two into one count makes the handover awkward. If several presentation formats are involved, ask for them to be itemised separately in the quotation so there is no ambiguity on delivery.
Quantities, Samples and Timing
A typical opening quantity is 50 coins, and most departments start between 100 and 300. The exact number depends on how many members will receive one, how many are held for new arrivals, and whether a reserve is kept for presentations. Decide those three lines separately rather than picking a round number.
- Reserve allocation: hold a small number for promotions, new members and unexpected visitors. Running out of a unit coin mid-year is awkward.
- Physical sample: request one for a first order or a new design. It confirms weight, enamel colour and edge treatment together — things a proof cannot show.
- Timeline: production usually runs 18–25 days after proof and tooling approval, followed by shipping to US and Canadian addresses. Approving the proof quickly is the largest scheduling lever you control.
- Reorders: the same design reuses the existing die, so a repeat order keeps the same tooling and the same visual identity.
Work backwards from the date the coins are needed, not from the date the design is finished. A retirement ceremony or an anniversary event will not move, and the approval stage is the one that usually absorbs the slack. Put the needed-by date in the enquiry so your sourcing partner can confirm the window before you commit to a design.
How a Sourcing Partner Works on a Coin Order
MedalSmith is a sourcing partner and custom metal specialist, not a factory. We work with vetted factories and handle the specification, proofing and production schedule on your behalf. For a unit that is ordering coins once every few years, that means one point of contact who understands the design history instead of restarting the conversation from scratch each time.
The process begins with your artwork and your deadline. We check whether the design suits the chosen diameter and relief depth, flag anything that will not reproduce cleanly, and prepare a digital proof. After approval the die is cut, a sample can be arranged if requested, and production begins. You receive updates at the main checkpoints. The quotation sets out each part of the specification and the expected in-hands date — ask for both in writing when you request a quote.
Because a coin’s specification changes with size, thickness, plating and relief work, we do not publish a single figure that would be wrong for most orders. Send the diameter, finish, edge, quantity and needed-by date instead. If the artwork is not ready, that is fine — the ordering FAQ covers the usual process questions, and the case studies page shows how other units approached the same decisions.
Common Mistakes When Ordering Unit Coins
- Cramming too much text into a 1.5″ coin. Choose a larger diameter or shorten the motto; small type will not survive casting.
- Specifying plating before the enamel colours. The metal tone changes how colours read, so settle them together.
- Copying a patch design unchanged. Fabric detail and metal detail are different crafts; simplify first.
- Skipping the proof because the artwork looks finished on screen. A proof shows the coin at its real size, which is the only view that matters.
- Ordering one flat count for everyone. Members, reserves and presentation pieces are separate lines.
Every one of these is easy to correct at the specification stage and difficult to correct after tooling. The purpose of this guide is to get the decisions made early, while they still belong to you.
Key Takeaways
- Specify a coin in five lines — diameter, thickness, finish, edge and relief depth — then add quantity and presentation format.
- 2″ is the standard unit-coin size; 3 mm is the usual thickness, with 4 mm chosen when a weightier feel matters.
- Soft enamel suits coloured designs, hard enamel suits commemoratives and die struck suits traditional all-metal relief.
- Antique platings hide pocket wear and photograph well; black nickel gives bright colours the strongest contrast.
- Choose 2D for text-led designs and 3D for portraits, crests and layered emblems.
- Supply the highest-resolution patch or badge image available, and approve the proof at full size before tooling.
FAQ
What size should a police or fire department challenge coin be?
2 inches (50 mm) is the standard for unit coins because it holds a badge, a unit name, a motto and a date without shrinking the type. A 1.75″ coin works for simpler emblems and everyday carry; larger sizes suit presentation pieces that will be displayed rather than carried.
Can you match our department’s colours from a patch?
Yes. Supply Pantone references or a high-resolution patch photograph and the enamel colours can be matched at the proof stage. The digital proof shows the colour placement before tooling begins, which is the point to confirm it.
Is a 3D coin better than a 2D coin?
Neither is universally better. 3D suits designs with real depth — portraits, layered crests, animals. 2D reads sharper for text-led designs and simple badges, and holds small type more cleanly. Ask to compare both configurations before deciding.
How long does a custom challenge coin order take?
Production usually runs 18–25 days after proof and tooling approval, followed by shipping to US and Canadian addresses. Approving the digital proof promptly is the most reliable way to protect the schedule; a needed-by date in the enquiry lets your sourcing partner confirm the window.
What happens if we reorder the same coin?
The existing die is reused for the same design, so the tooling and visual identity stay consistent. Keep the vector artwork, the approved proof and the plating notes together so the reorder starts from a settled specification.
Last updated: November 2026.
Have a patch, badge or sketch that needs to become a coin? Send the specification through the quote form and confirm the production window before your event date closes in.